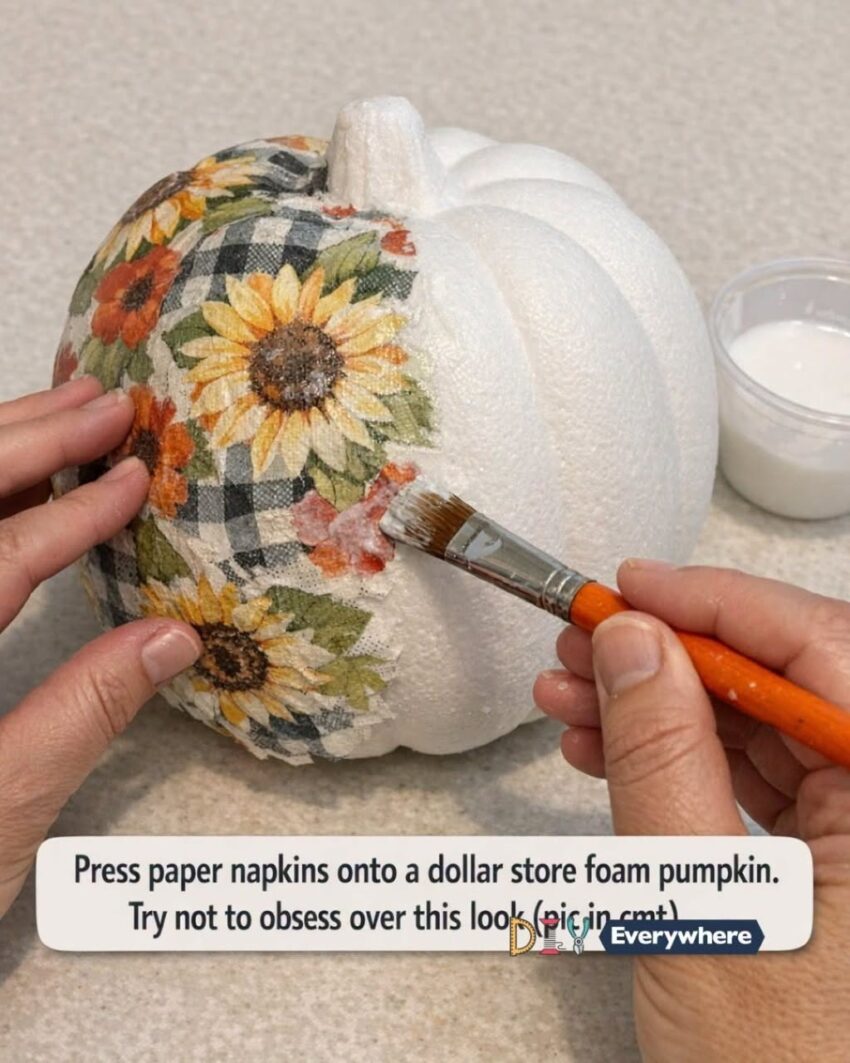
Learn how to transform an inexpensive foam pumpkin with paper napkins into beautiful fall décor. This easy DIY craft creates a charming farmhouse-style decoration on a budget.
Looking for a simple way to make your home feel cozy and inviting this fall? You might be surprised by what you can create with an inexpensive foam pumpkin and a few ordinary paper napkins.
This clever DIY project transforms a basic dollar-store pumpkin into a decorative piece that looks much more expensive than it is. With the right napkin pattern, a little adhesive, and some patience, you can create a unique autumn decoration for your dining table, mantel, or entryway.
The best part? You don’t need advanced crafting skills to achieve a beautiful result.
What You’ll Need
Gather these affordable supplies before getting started:
- One foam pumpkin from a dollar store or discount shop
- Decorative paper napkins with floral, botanical, vintage, or autumn patterns
- Decoupage glue or a suitable craft adhesive
- A small paintbrush
- Scissors
- A little acrylic paint, if desired
- Ribbon, twine, or artificial leaves for decoration
Choose napkins with a design that complements your home’s color scheme. Neutral florals, soft cream patterns, vintage illustrations, and muted autumn colors can all look beautiful.
Step 1: Prepare Your Foam Pumpkin
Start by removing any price stickers, dust, or loose particles from the pumpkin. Wipe it gently with a dry cloth and let it dry completely.
If the pumpkin has a bright orange finish that you don’t want showing through the napkin design, you can apply a thin coat of compatible acrylic paint. Allow it to dry before moving on.
Step 2: Prepare the Paper Napkins
Choose a napkin with a pattern you love and carefully separate its thin printed top layer from the plain layers underneath.
This is an important step because the printed layer is usually thinner and easier to apply smoothly to a curved surface.
Cut or tear the design into manageable sections. Smaller pieces are generally easier to work with around the pumpkin’s curves and grooves.
Step 3: Apply a Thin Layer of Adhesive
Use a paintbrush to spread a thin, even layer of decoupage glue over a small section of the foam pumpkin.
Avoid covering the entire pumpkin with glue at once. Working in small sections gives you more control and prevents the adhesive from drying before you position the napkin.
Make sure the adhesive is suitable for foam.
Step 4: Press the Napkin Onto the Pumpkin
Carefully place a piece of the printed napkin onto the glued area.
Use your fingertips or a soft brush to gently press it against the surface, working from the center outward to reduce wrinkles and air bubbles.
Don’t pull the napkin too hard because the thin paper can tear easily. Small wrinkles may occur around the pumpkin’s natural grooves, but they can add to the handmade look.
Repeat this process until the desired areas are covered.
Step 5: Smooth the Edges
Once the paper is in place, carefully smooth down any loose edges. Apply another thin layer of suitable decoupage glue over the surface if the product instructions recommend it.
Allow the pumpkin to dry completely. Avoid handling it too much while the paper is wet, as this can cause tearing or shifting.
Step 6: Add Decorative Finishing Touches
Now comes the fun part: personalizing your creation.
Try one of these ideas:
- Farmhouse style: Wrap twine around the stem and add a small artificial leaf.
- Vintage style: Choose napkins with faded floral prints or botanical illustrations.
- Elegant style: Use cream, beige, and muted gold tones.
- Rustic autumn style: Pair a warm-toned napkin with a simple raffia bow.
- Minimalist style: Use a subtle botanical pattern and leave some of the pumpkin uncovered.
Keep the embellishments simple so the napkin design remains the main attraction.
Tips for a Beautiful Finish
Use thin layers. Too much adhesive can saturate the paper and cause tearing or wrinkles.
Work slowly. Smaller pieces are easier to position than one large sheet of napkin.
Choose the right glue. Test it on a small, inconspicuous area first, especially if the pumpkin is made from delicate foam.
Allow enough drying time. Follow the adhesive manufacturer’s instructions before adding decorations or displaying the pumpkin.
Keep it indoors. Paper-covered foam pumpkins are generally best suited to indoor décor unless the materials have been specifically designed for outdoor use.
Where Can You Display Your Finished Pumpkin?
Your finished creation can become a charming seasonal accent in several places around your home.
Place it on a coffee table alongside a small vase of dried flowers, add it to an autumn centerpiece, or arrange several pumpkins of different sizes on a mantel. You can even make a matching set using different napkin patterns in complementary colors.
These handmade pumpkins also make thoughtful seasonal gifts for friends and family.
Final Thoughts
Transforming a simple foam pumpkin with decorative paper napkins is an affordable, creative way to refresh your home for autumn. The process requires only a few supplies, and you can customize the finished piece to suit almost any decorating style.
Once you see how beautiful the finished pumpkin looks, you may find yourself wanting to make another one. Sometimes, the most charming home decorations begin with the simplest materials.