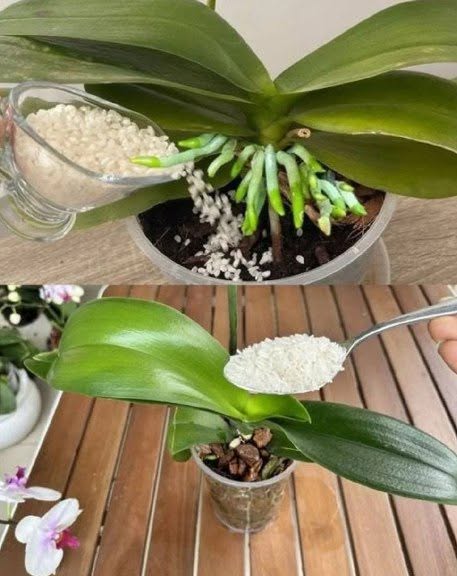
Want more orchid flowers? Learn the simple fertilizing technique that can encourage healthy growth and repeat blooming while avoiding common mistakes that damage orchid roots.
Orchids can look absolutely spectacular when covered in flowers, but getting them to bloom repeatedly isn’t simply about adding more fertilizer.
In fact, overfertilizing is one of the most common mistakes orchid growers make. The real secret is using the right fertilizer, at the right strength, at the right time—and giving the plant the growing conditions it needs.
The Biggest Orchid-Fertilizing Mistake
Many people assume that if a little fertilizer helps a plant grow, more fertilizer must produce even more flowers.
With orchids, that can backfire.
Too much fertilizer can cause salt buildup around the roots, damage sensitive roots, and encourage excessive leafy growth without producing the flowering you’re hoping for.
Instead of feeding heavily, orchids generally benefit from light, consistent fertilization during active growth.
The Simple Fertilizing Method
For many commonly grown orchids, such as Phalaenopsis, a balanced orchid fertilizer used according to its label directions is a practical choice.
A simple routine is:
- Water the orchid first if the potting medium is very dry.
- Prepare diluted fertilizer according to the product’s instructions.
- Apply the fertilizer to the growing medium rather than concentrating it on the leaves or crown.
- Allow excess water to drain completely.
- Periodically flush the potting medium with plain water to help remove accumulated fertilizer salts.
The exact frequency should depend on the fertilizer, growing conditions, season, and orchid species.
Why Watering First Can Help
Dry orchid roots can be particularly vulnerable to concentrated fertilizer.
If the potting mix is completely dry, watering the plant normally before fertilizing can help ensure the roots aren’t exposed to a highly concentrated fertilizer solution.
Always follow the directions on your particular fertilizer rather than assuming that a homemade concentration is safe.
Don’t Pour Fertilizer Into the Crown
One area that deserves special attention is the crown, where the leaves meet at the center of a Phalaenopsis orchid.
Avoid allowing water or fertilizer solution to sit in the crown for extended periods.
Standing moisture can encourage crown rot.
If water accidentally collects there, gently remove it with a clean paper towel.
More Fertilizer Doesn’t Mean More Flowers
Flowering depends on much more than nutrients.
Your orchid also needs:
- Appropriate light
- Correct watering
- Good drainage
- Suitable temperatures
- Healthy roots
- Appropriate humidity
- A suitable potting medium
If an orchid is sitting in a dark corner, adding extra fertilizer isn’t going to magically make it produce masses of flowers.
Light Is Often the Missing Ingredient
For many indoor Phalaenopsis orchids, bright, indirect light is important for healthy growth and flowering.
An orchid receiving insufficient light may produce large green leaves but fail to bloom.
On the other hand, intense direct sunlight through a hot window can scorch the leaves.
A bright location with filtered light is often a good starting point.
What About the Famous “Banana Peel” Fertilizer?
You may have seen recipes recommending banana peels, rice water, coffee grounds, eggshells, or other kitchen ingredients for orchids.
These recipes are popular online, but they’re not magic flowering treatments.
Homemade mixtures can also create problems if they encourage mold, attract pests, or leave organic material around the roots.
A properly formulated orchid fertilizer makes it much easier to control what nutrients you’re giving the plant.
The Importance of Flushing the Pot
Over time, fertilizer salts can accumulate in the potting medium.
This is one reason occasional watering with plain water can be useful.
Run plenty of clean water through the potting medium and allow it to drain completely.
Make sure the container has drainage holes and never leave the orchid sitting in stagnant water.
Should You Fertilize a Blooming Orchid?
You don’t necessarily need to stop fertilizing simply because flowers have appeared.
However, the plant’s needs depend on its growth stage and species.
Once an orchid has finished flowering, continuing appropriate care—including suitable light, watering, and nutrition during active growth—can help it remain healthy and potentially prepare for another flowering cycle.
After the Flowers Fall
Don’t immediately throw away the orchid because its flowers have disappeared.
A healthy orchid can bloom again.
Depending on the species and the condition of the flower spike, you may be able to leave the spike in place, trim it above a node, or cut it back. Phalaenopsis orchids can sometimes produce additional branches from an existing green spike, although this isn’t guaranteed.
If the spike has turned completely brown or dry, it can generally be removed.
The Real Secret to Long-Lasting Blooms
There isn’t one fertilizer ingredient that makes orchids “explode” with flowers for months.
The most reliable approach is a combination of adequate light, careful watering, good drainage, appropriate temperatures, and moderate fertilization.
Think of fertilizer as food that supports the plant—not as a flowering switch.
Final Takeaway
If your orchid isn’t blooming, don’t immediately reach for more fertilizer.
Start by checking its light, roots, watering routine, potting medium, and overall health. Then use a quality orchid fertilizer at the recommended dilution rather than applying increasingly concentrated doses.
The goal isn’t to feed your orchid as much as possible. It’s to give it exactly what it needs, consistently and without overwhelming its roots.
With the right routine, your orchid can stay healthy and may reward you with beautiful blooms again and again.