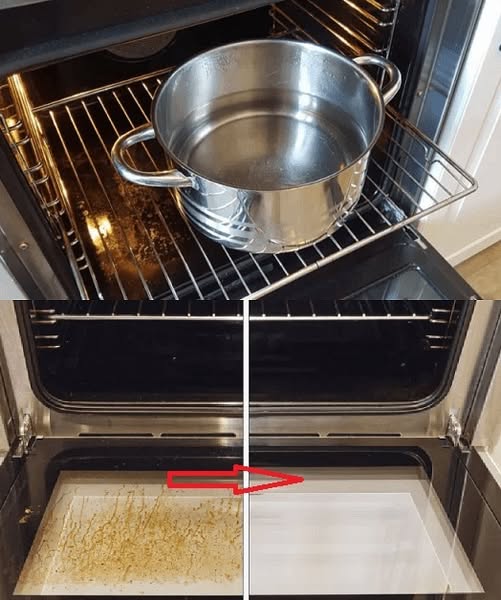
Learn how to clean a dirty oven quickly using simple household supplies, remove grease and baked-on food, and make your oven look fresh without spending hours scrubbing.
A dirty oven can quickly become one of the hardest areas of the kitchen to clean. Grease splatters, baked-on food, crumbs, and smoky residue can build up over time, leaving the inside looking dark and neglected.
Fortunately, you don’t always need hours of exhausting scrubbing. With the right approach, you can loosen stubborn grime and make oven cleaning much easier.
What You’ll Need
Before you begin, gather:
- Baking soda
- Dishwashing liquid
- Warm water
- A spray bottle
- A soft sponge or microfiber cloth
- A non-abrasive scrubbing pad
- An old toothbrush for corners
- Rubber gloves
- A clean towel
Step 1: Empty the Oven
Make sure the oven is completely cool and switched off.
Remove the oven racks, trays, thermometer, and anything else that can be taken out.
Brush or vacuum loose crumbs from the bottom before applying any cleaning solution.
Step 2: Make a Simple Cleaning Paste
Mix baking soda with a small amount of water until you have a thick paste.
For particularly greasy areas, add a little dishwashing liquid.
The goal is to create a spreadable paste rather than a watery mixture.
Step 3: Apply It to the Grime
Spread the paste over the dirty surfaces inside the oven.
Pay special attention to:
- The oven floor
- The back wall
- Greasy corners
- Areas around baked-on spills
- The inside of the oven door
Avoid heating elements, gas burners, electrical components, and ventilation openings.
Step 4: Let It Sit
This is the part that saves you the most effort.
Instead of immediately scrubbing, allow the paste to sit for several hours—or overnight for heavy buildup.
The longer contact time helps soften dried-on grease and food residue.
Step 5: Wipe Away the Grime
Use a damp sponge or microfiber cloth to wipe away the loosened residue.
For stubborn spots, gently work with a non-abrasive pad.
An old toothbrush can help reach narrow corners and around the edges of the door.
Avoid aggressive scraping that could damage the oven’s finish.
Step 6: Clean the Oven Racks
Place the racks in a bathtub, large basin, or suitable container.
Soak them in hot water with dishwashing liquid for a while, then scrub away the softened grease.
Rinse thoroughly and dry them before putting them back.
Check your oven manufacturer’s instructions before using any specialized soaking or cleaning products on racks.
Step 7: Give the Door Some Extra Attention
The glass door often collects a surprising amount of grease.
Use a damp cloth with a small amount of dish soap or an appropriate oven-glass cleaner.
Wipe thoroughly and dry with a clean microfiber cloth to reduce streaks.
Do not force anything between layers of oven-door glass unless the manufacturer specifically provides instructions for doing so.
Step 8: Final Wipe
Once the main grime is gone, wipe the entire interior several times with a clean, damp cloth.
This removes leftover cleaning residue.
Finally, dry the surfaces with a clean towel and replace the racks.
A Few Oven-Cleaning Mistakes to Avoid
Don’t mix cleaning chemicals. In particular, never combine bleach, ammonia, or commercial cleaning products unless the manufacturer specifically says they are compatible.
Don’t use abrasive tools aggressively. Steel wool and harsh scrapers can damage some oven surfaces.
Don’t spray directly onto electrical components or heating elements.
Don’t forget the manufacturer’s instructions. Some ovens have catalytic liners, steam-cleaning functions, or self-cleaning cycles that require specific cleaning methods.
How to Keep Your Oven Cleaner for Longer
Once you’ve done the deep clean, prevention makes future cleaning much easier.
Wipe up spills after the oven has cooled. Place suitable baking trays underneath foods that are likely to bubble over, and avoid allowing grease to accumulate for months.
A quick wipe every few uses can save you from another major cleaning session later.
Final Tip
The biggest secret isn’t scrubbing harder—it’s letting the cleaning solution sit long enough to loosen the buildup.
With a little preparation and patience, even a greasy oven can look dramatically cleaner without spending your entire day scrubbing.
Important: Always follow your oven manufacturer’s cleaning instructions, especially if your appliance has a self-cleaning or special coated interior.