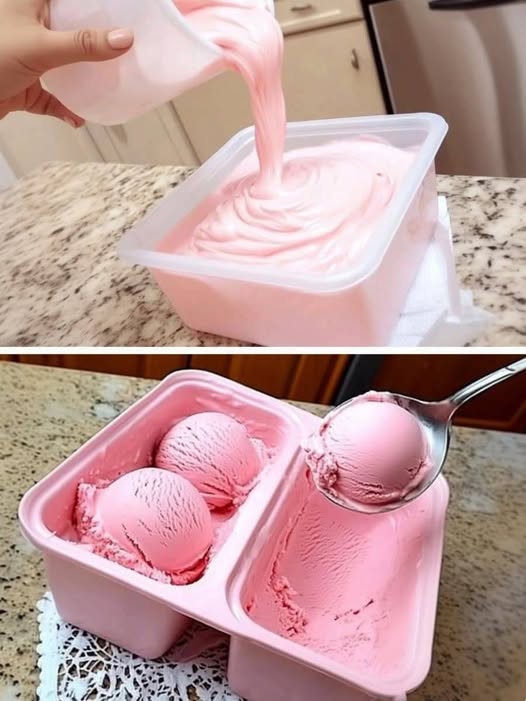
Make incredibly creamy homemade ice cream with just 4 simple ingredients. This easy no-churn ice cream recipe requires no ice cream maker and is perfect for a quick homemade dessert.
Nothing beats a bowl of rich, creamy homemade ice cream on a warm day. And the best part? You don’t need a fancy ice cream machine or a long list of ingredients to make it at home.
This easy 4-ingredient ice cream recipe creates a smooth, creamy dessert with very little effort. It is a simple no-churn recipe that is perfect when you want something sweet without spending hours in the kitchen.
Why You’ll Love This Recipe
There are plenty of reasons to keep this recipe handy:
- Only 4 basic ingredients
- No ice cream maker required
- Simple preparation
- Rich and creamy texture
- Easy to customize with different flavors
- Perfect for summer parties and family desserts
- Can be prepared ahead of time
Once you try homemade ice cream this way, you may be surprised by how easy it is.
Ingredients
You only need four ingredients:
- 2 cups heavy whipping cream
- 1 can sweetened condensed milk
- 1 teaspoon vanilla extract
- A small pinch of salt
The heavy cream provides the rich, creamy base, while sweetened condensed milk adds sweetness and helps create a smooth texture.
Vanilla gives the ice cream its classic flavor, while a tiny pinch of salt helps balance the sweetness.
How to Make 4-Ingredient Homemade Ice Cream
Step 1: Chill Your Equipment
For the best results, place your mixing bowl and beaters in the refrigerator or freezer for a few minutes before starting.
Cold equipment can help the cream whip more easily.
Step 2: Whip the Cream
Pour the cold heavy whipping cream into a large mixing bowl.
Using an electric mixer, whip the cream until it becomes thick and forms soft-to-medium peaks.
Be careful not to overbeat it. You want whipped cream that is fluffy and stable rather than grainy or separated.
Step 3: Add the Condensed Milk
Slowly add the sweetened condensed milk to the whipped cream.
Gently fold the mixture together using a spatula.
Try not to stir too aggressively because keeping some of the air in the whipped cream helps produce a lighter texture.
Step 4: Add Vanilla and Salt
Add the vanilla extract and a small pinch of salt.
Fold everything together until the mixture is smooth and evenly combined.
At this point, you should have a thick, creamy mixture ready for freezing.
Step 5: Freeze
Transfer the mixture to a freezer-safe container.
Smooth the top with a spatula.
Cover the container tightly and place it in the freezer.
Freeze for approximately 6 hours or overnight, until the ice cream is firm.
Step 6: Let It Soften Before Serving
Homemade ice cream can become quite firm in the freezer.
Before serving, let it sit at room temperature for approximately 5–10 minutes. This makes it easier to scoop and gives it a softer, creamier consistency.
Serve in bowls, cones, or alongside your favorite dessert.
Easy Flavor Variations
The basic vanilla version is delicious on its own, but you can easily customize it.
Chocolate Ice Cream
Add unsweetened cocoa powder to the mixture before freezing. Start with a small amount and adjust according to your taste.
You can also fold in chocolate chips or small pieces of chocolate.
Strawberry Ice Cream
Fold finely chopped strawberries into the finished mixture before placing it in the freezer.
For a stronger strawberry flavor, you can add a little strawberry puree, but avoid adding too much liquid because it can affect the final texture.
Cookies and Cream
Crush your favorite chocolate sandwich cookies and gently fold them into the ice cream mixture.
Save a few crushed cookies to sprinkle over the top before freezing.
Mango Ice Cream
For a tropical variation, gently fold in mango puree or finely chopped ripe mango.
Make sure the fruit isn’t excessively watery.
Peanut Butter Ice Cream
Add spoonfuls of creamy peanut butter and gently swirl it through the mixture.
You can also add chopped peanuts or chocolate pieces for extra texture.
Tips for Extra Creamy Ice Cream
A few simple tricks can make a noticeable difference.
Use Very Cold Cream
Keep the heavy cream refrigerated until you’re ready to whip it.
Cold cream generally whips more effectively than warm cream.
Don’t Overwhip
Stop whipping once the cream reaches the desired consistency.
Overwhipping can make the cream grainy and eventually cause it to turn toward butter.
Fold Gently
When combining the whipped cream and condensed milk, fold rather than vigorously stirring.
This helps preserve the air incorporated into the cream.
Use an Airtight Container
Store the ice cream in a freezer-safe airtight container.
This helps reduce exposure to air and can help prevent unwanted ice crystals and freezer odors.
Don’t Add Too Much Liquid
If you’re experimenting with fruit or other flavorings, avoid adding excessive liquid. Too much water can make homemade ice cream icy rather than creamy.
How Long Does Homemade Ice Cream Last?
For the best flavor and texture, homemade ice cream is generally best enjoyed within a couple of weeks.
Keep it tightly covered and stored in the coldest, most consistent part of your freezer.
If ice crystals develop on the surface, the ice cream may still be safe to eat, but its texture and quality may not be as good.
How to Serve It
There are countless ways to enjoy this creamy homemade ice cream.
Try serving it with:
- Fresh berries
- Chocolate sauce
- Caramel sauce
- Chopped nuts
- Crushed cookies
- Fresh fruit
- Sprinkles
- Whipped cream
- Brownie pieces
- Warm fruit crumble
You can also use a scoop of homemade ice cream to turn a simple dessert into something special.
Frequently Asked Questions
Can I make this without an ice cream maker?
Yes. This is a no-churn recipe, so an ice cream machine isn’t required.
Why is my homemade ice cream too hard?
Homemade ice cream can freeze harder than some commercial varieties. Allow it to sit at room temperature for a few minutes before scooping.
Can I use a different extract?
Yes. Vanilla is the classic choice, but almond, coconut, or another suitable flavor extract can be used in small amounts.
Can I add toppings before freezing?
Absolutely. Cookies, chocolate chips, nuts, fruit pieces, and other additions can be folded into the mixture before freezing.
Can I make it less sweet?
Sweetened condensed milk is a major source of sweetness in this recipe, so reducing it can change both the sweetness and texture. Instead, consider using naturally less-sweet additions such as unsweetened cocoa powder or fresh berries.
Final Thoughts
Making homemade ice cream doesn’t have to be complicated. With just four simple ingredients, a mixer, and some freezer space, you can create a rich and creamy dessert at home without an ice cream maker.
The classic vanilla version is a great starting point, but once you’ve mastered the basic recipe, you can experiment with chocolate, strawberries, cookies, mango, peanut butter, or your favorite toppings.
For the creamiest result, keep the ingredients cold, whip the cream carefully, fold gently, and give the ice cream enough time to freeze properly.
Simple ingredients, minimal effort, and a deliciously creamy homemade dessert—that’s what makes this recipe worth keeping.