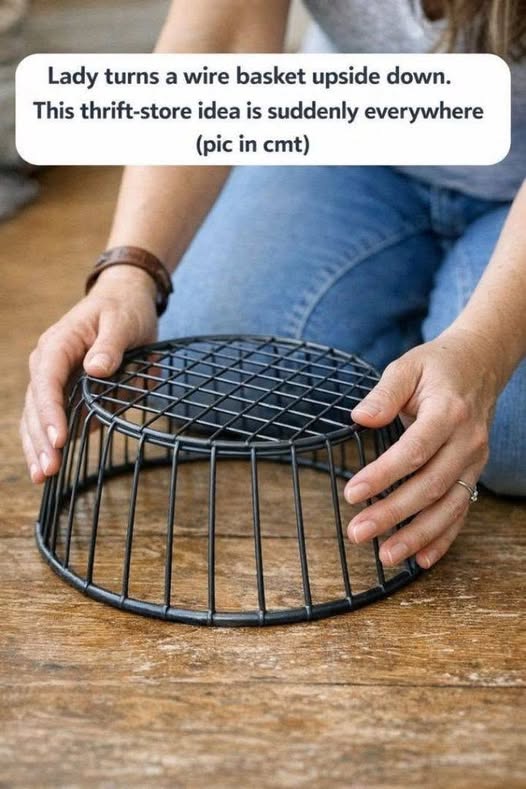
Sometimes the best home décor ideas are the simplest ones. Instead of spending money on a new side table, you can transform an ordinary wire basket into a stylish piece of furniture with just a few basic materials.
An upside-down wire basket makes a surprisingly attractive table base. Add a round wooden top, secure the two pieces together, and you have a lightweight accent table that can work beside a sofa, armchair, bed, or even in a small entryway.
What You’ll Need
The exact supplies depend on the size and style you want, but you can usually make this project with:
- One sturdy wire basket
- A round wooden board or tabletop
- Screws, bolts, or suitable fasteners
- Washers and nuts if needed
- A drill and drill bit
- Measuring tape
- Sandpaper
- Wood stain or paint
- Metal spray paint, optional
- Rubber or felt furniture pads
- Screwdriver or wrench
Choose a wire basket that is strong enough to support the tabletop and anything you plan to place on it.
Step 1: Choose the Right Basket
Start with a wire basket that has a relatively wide opening and a stable shape.
Turn it upside down and look at how it sits on the floor. The bottom of the basket will become the base of your table, while the wider opening will support the tabletop.
A basket with a symmetrical shape usually produces the most balanced-looking table.
Before beginning, check the wire carefully for sharp points, loose connections, rust, or damaged sections.
Step 2: Select Your Tabletop
A round wooden board is an easy choice because it gives the finished piece a clean, modern appearance.
The tabletop should be slightly wider than the basket base so that it creates a small overhang around the edges. Avoid making the top excessively large or heavy, especially if the wire basket is lightweight.
You can leave the wood natural for a minimalist look, stain it for warmth, or paint it to coordinate with your room.
Step 3: Prepare the Wood
Lightly sand the tabletop to remove rough edges and splinters.
If you’re staining the wood, apply your chosen stain according to the manufacturer’s instructions and allow it to dry completely.
For a painted finish, use a suitable primer and paint designed for wood. You can also add a clear protective finish if the table will receive frequent use.
Step 4: Turn the Basket Upside Down
Place the wire basket upside down on a flat surface.
Position the wooden tabletop over the basket and center it carefully. Measure the distance from the edge of the tabletop to several points around the basket to make sure it isn’t sitting off-center.
Take your time with this step because proper alignment makes a big difference in the finished appearance.
Step 5: Mark the Attachment Points
Once the tabletop is centered, mark several points where the wood will connect to the wire basket.
Depending on the design of the basket, you may be able to attach the tabletop at three or four points.
Three evenly spaced attachment points can provide good stability, while four points may offer additional support.
Avoid drilling too close to the edge of the wooden board.
Step 6: Attach the Tabletop
Drill small pilot holes into the marked areas of the wood.
Then secure the wire basket to the tabletop using appropriate screws, bolts, washers, or other hardware suitable for the materials.
The exact attachment method will depend on the construction of your basket. The important thing is to create a secure connection rather than simply resting the wood on top.
Do not overtighten the hardware, as excessive pressure can damage the wood or bend the wire.
Step 7: Check the Stability
Turn the table upright and gently test it.
Place your hands on different areas of the tabletop and apply light pressure. The table should remain stable without rocking excessively.
If it wobbles, check whether the basket is sitting evenly on the floor. You can add small felt or rubber furniture pads to compensate for minor unevenness.
For a table that will be used regularly, stability should always be more important than appearance.
Step 8: Give the Basket a Makeover
If you don’t like the original color of the wire basket, you can change its appearance with paint designed for metal.
Clean the basket first and remove dust, grease, and loose rust. Allow it to dry thoroughly before painting.
A simple black, white, bronze, or metallic finish can completely change the character of the table.
For the best result, apply thin coats rather than one heavy coat and allow adequate drying time between coats.
Easy Ways to Customize Your Table
One of the best things about this DIY project is how easily you can personalize it.
Rustic Style
Use a natural or distressed wooden top with a darker metal basket. The combination works especially well with farmhouse and rustic décor.
Modern Style
Choose a smooth round tabletop and a simple black or white wire basket for a clean contemporary appearance.
Boho Style
Try a natural wood top paired with a warm-toned basket. Add a small plant, woven basket, or decorative object to complete the look.
Colorful Accent Table
Paint the wire base in a bold color and keep the tabletop natural. This can turn a basic storage basket into a playful statement piece.
Where to Use Your DIY Side Table
This little table can be surprisingly versatile.
Place it beside a sofa for a spot to hold a cup of coffee, books, or a small lamp. Use it next to an armchair as a reading table, or place it beside a bed as a compact nightstand.
It can also work as a plant stand, entryway accent table, or decorative pedestal.
Because wire baskets are often relatively lightweight, the finished table can be easier to move around than a traditional wooden side table.
A Few Important Safety Tips
Before using the table, make sure every attachment point is secure and that there are no sharp wire ends exposed.
Avoid placing very heavy objects on a lightweight basket base. This project is best suited to everyday decorative and light household use unless the materials have been specifically designed to support heavier loads.
If you have children or pets, test the table carefully for tipping and consider adding non-slip furniture pads.
The Beauty of Simple DIY Furniture
You don’t always need expensive materials or complicated woodworking skills to create attractive furniture.
A basic wire basket and a wooden board can become a functional side table with a little creativity and careful assembly. The project is inexpensive, customizable, and easy to adapt to different decorating styles.
The key is choosing a sturdy basket, using a properly sized tabletop, securing the two pieces firmly, and taking the time to make sure the finished table is stable.
What begins as an ordinary wire basket can end up looking like a thoughtfully designed piece of home décor—and that’s the charm of a good DIY project.
Meta Description: Transform an upside-down wire basket into a stylish DIY side table with a wooden top. Follow this simple, budget-friendly project for a chic home décor upgrade.