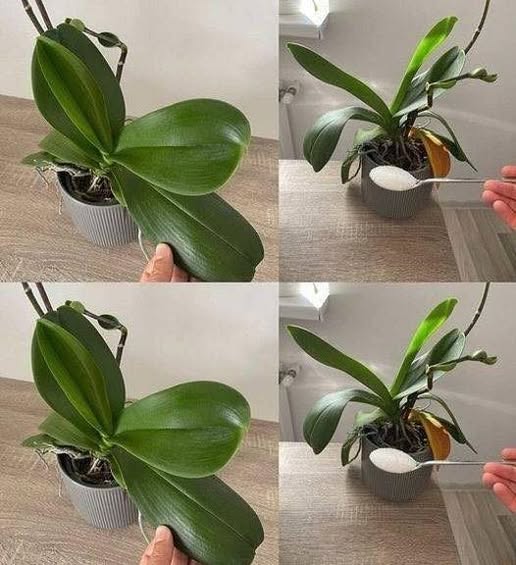
Learn how to fertilize orchids safely and encourage healthy growth and flowering with proper feeding, watering, light, and care.
Orchids can produce spectacular flowers, but getting them to bloom again can sometimes feel like a challenge. This has led to countless homemade fertilizer recipes promising that one tablespoon of a particular ingredient will make orchids bloom continuously.
The truth is a little less magical: no single tablespoon of fertilizer can guarantee nonstop flowering. Orchids need the right combination of light, watering, temperature, nutrients, and healthy roots.
Still, a simple feeding routine can make a noticeable difference when an orchid isn’t receiving enough nutrients.
Why Orchids Need Fertilizer
Orchids grown in pots don’t have unlimited access to nutrients. Over time, nutrients can become depleted from the potting medium, especially when the plant is watered frequently.
A suitable orchid fertilizer can provide nutrients needed for:
- New leaf growth
- Root development
- Overall plant health
- Flower production
But fertilizer works best when the plant’s other growing conditions are already suitable.
The “One Tablespoon” Trick
If a recipe recommends using one tablespoon of fertilizer, don’t assume that tablespoon is a universal dose.
Concentrated fertilizers differ greatly in strength.
Always check the fertilizer label and follow the manufacturer’s dilution instructions. Using too much fertilizer can damage orchid roots rather than encourage more flowers.
For many orchids, a diluted, balanced fertilizer used periodically during active growth is safer than applying a large amount at once.
Don’t Fertilize a Dry Orchid
One common mistake is applying fertilizer to a severely dry plant.
If the roots are dehydrated, strong fertilizer can increase the risk of root damage.
Water the orchid appropriately first, then fertilize according to the product directions.
Light Is Often More Important Than Fertilizer
If an orchid isn’t blooming, fertilizer may not be the main problem.
Many orchids need bright, indirect light to produce flowers.
A location near a bright window can work well, but intense direct midday sunlight can scorch leaves.
A useful clue is the foliage: very dark green leaves can sometimes indicate insufficient light, while yellowing or scorched leaves may indicate excessive light or another problem.
Water Carefully
Orchids generally don’t like constantly waterlogged roots.
Allow the growing medium to dry appropriately between waterings, depending on the orchid species, potting medium, temperature, humidity, and growing conditions.
Always make sure excess water can drain away.
Never leave an orchid sitting in stagnant water for long periods.
Check the Roots
Healthy roots are essential for flowering.
If an orchid has soft, brown, mushy, or foul-smelling roots, adding more fertilizer isn’t likely to solve the problem.
The plant may need attention to its watering routine, drainage, or potting medium first.
Healthy roots are generally firm and may appear green when wet or silvery when dry, depending on the orchid.
What About Homemade Fertilizers?
You may see recommendations involving:
- Rice water
- Banana peels
- Coffee grounds
- Eggshells
- Milk
- Sugar water
These remedies are popular online, but they aren’t automatically better than a properly formulated orchid fertilizer.
Some homemade mixtures can encourage mold, attract pests, create unpleasant odors, or provide nutrients in forms the plant can’t easily use.
If you want predictable nutrition, a fertilizer specifically formulated for orchids is generally the more straightforward choice.
How to Encourage More Flowers
For healthier orchids and better chances of reblooming:
Provide bright, indirect light
Good lighting is essential for photosynthesis and flowering.
Avoid overwatering
Let the growing medium dry appropriately and use a pot with good drainage.
Feed appropriately
Use an orchid fertilizer according to its label rather than guessing the amount.
Maintain suitable temperatures
Many orchids respond well to a difference between daytime and nighttime temperatures, although the ideal conditions depend on the species.
Give the plant time
After flowering, an orchid may naturally enter a resting period before producing another flower spike.
“Non-stop blooming” isn’t realistic for most orchids. A healthy plant naturally alternates between growth and flowering.
A Simple Orchid-Care Routine
Instead of relying on a miracle tablespoon, try this approach:
- Place the orchid in bright, indirect light.
- Water when appropriate for the growing medium and environment.
- Allow excess water to drain completely.
- Use a diluted orchid fertilizer according to the label.
- Check roots regularly for signs of rot.
- Remove dead flowers and damaged plant material.
- Give the orchid time to recover and produce a new flowering cycle.
Final Thoughts
A tablespoon of fertilizer isn’t a magic formula for endless orchid flowers. Too much fertilizer can actually harm the plant.
The most reliable way to encourage blooming is to provide the right balance of light, water, drainage, nutrients, temperature, and patience.
If your orchid is healthy but hasn’t bloomed recently, don’t immediately assume it needs more fertilizer. Sometimes the plant simply needs the right environmental conditions—and time—to begin its next flowering cycle.