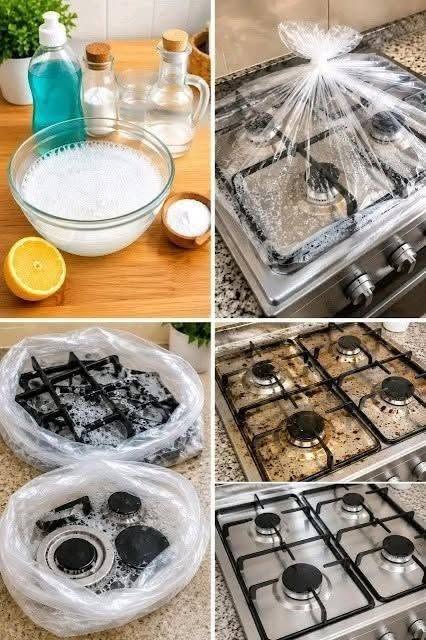
Discover the simple “envelope technique” for cleaning greasy kitchen stoves using everyday household supplies. Learn how to loosen stubborn grease, wipe away residue and leave your stovetop looking clean without harsh scrubbing.
The Kitchen Stove Is Like New With the “Envelope Technique”: Goodbye to Stubborn Grease
Greasy stovetops are one of those kitchen-cleaning problems that seem to return almost immediately.
Oil splashes, cooking residue and dried food can build up around burners and edges, creating a sticky layer that’s difficult to remove with an ordinary sponge.
A popular cleaning trick sometimes called the “envelope technique” offers a simple approach: instead of attacking the grease immediately with vigorous scrubbing, you first cover the greasy area with a warm cleaning solution to give the residue time to soften.
The result can be much easier cleaning with less effort.
What You’ll Need
You can keep the method simple:
- Warm water
- A few drops of dishwashing liquid
- A soft sponge or microfiber cloth
- Paper towels or a clean cloth
- A small plastic bag or food-safe plastic wrap, if appropriate for the surface
For especially greasy areas, a small amount of baking soda can be added to the cleaning solution.
Step 1: Remove Loose Debris
Make sure the stove is completely turned off and cool before cleaning.
Remove loose crumbs and food particles with a dry cloth.
If your stove has removable grates or burner caps, take them off if the manufacturer’s instructions allow it.
Step 2: Prepare the Cleaning Solution
Mix warm water with a small amount of dish soap.
Dish soap is useful because it is designed to break down grease and oils.
For stubborn residue, you can make a light paste from baking soda and water and apply it only to surfaces that are compatible with it.
Avoid using abrasive materials on delicate glass or coated surfaces.
Step 3: Create the “Envelope”
Here’s the idea behind the technique.
Soak a paper towel or cloth in the warm soapy solution, wring it out so it isn’t dripping, and place it directly over the greasy area.
Covering the area helps keep it warm and moist, allowing the cleaning solution more time to loosen dried grease.
Leave it for around 10–15 minutes.
You don’t need to scrub aggressively while the grease is still hardened.
Step 4: Wipe Away the Softened Grease
Remove the covering and gently wipe the surface with a microfiber cloth or soft sponge.
Much of the softened residue should come away more easily.
For particularly stubborn spots, repeat the process rather than attacking the surface with excessive force.
Step 5: Rinse and Dry
Wipe the stove again with a clean, damp cloth to remove soap and grease residue.
Then dry the surface thoroughly with a microfiber towel.
This final step helps prevent streaks and leaves the stovetop looking much cleaner.
Important Safety Tips
Never clean a hot stove.
If you’re cleaning a gas stove, make sure the burners are completely off and cool before beginning.
Also avoid allowing large amounts of water or cleaning solution to enter burner openings, ignition components or electrical controls.
Don’t mix household cleaning chemicals. In particular, never combine chlorine bleach with ammonia, acids or other incompatible cleaners.
What About the “Zero Fat” Claim?
The stove may look dramatically cleaner after this technique, but no household cleaning method guarantees literally zero grease.
The effectiveness depends on how old the grease is, what type of stovetop you have and how heavily it has been soiled.
The real advantage of the envelope technique is that it gives the cleaning solution time to loosen grease before you wipe, reducing the need for hard scrubbing.
The Bottom Line
A greasy stove doesn’t always require harsh chemicals or exhausting scrubbing.
Warm soapy moisture + a short soaking period + gentle wiping can make stubborn grease much easier to remove.
The next time your stovetop is covered with dried cooking residue, try softening the buildup first. You may be surprised by how much easier the cleaning becomes.