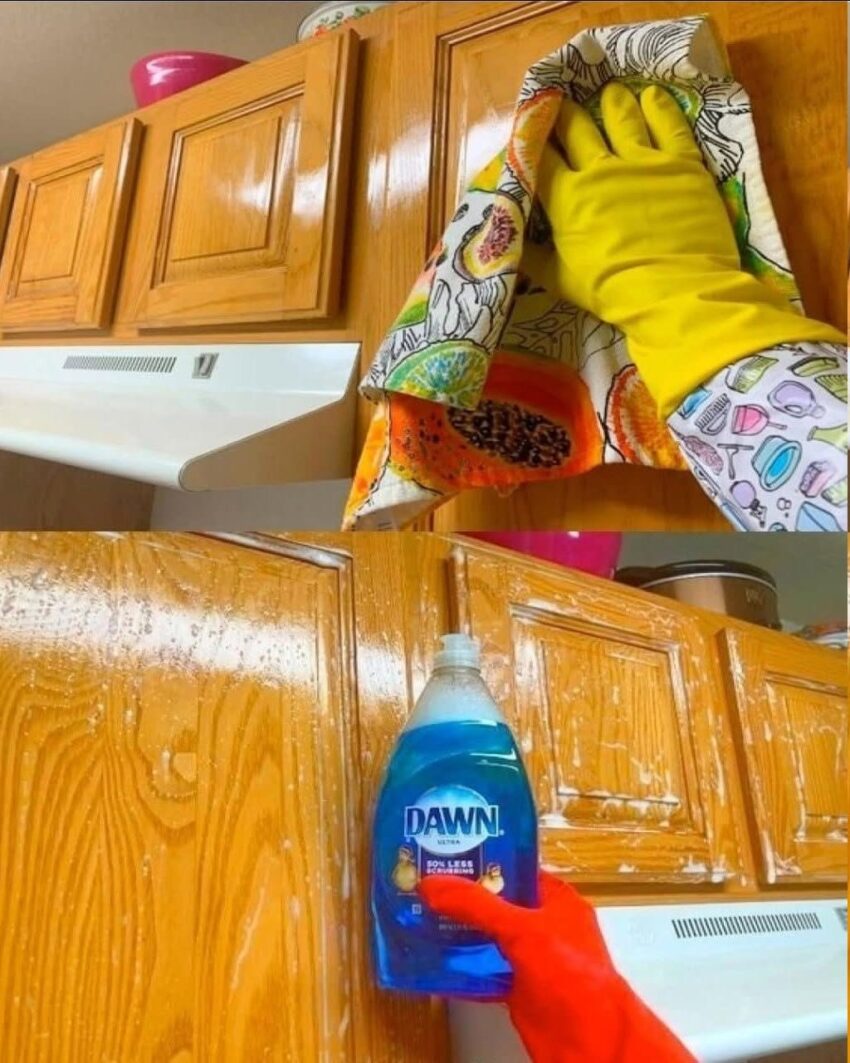
Learn how to safely clean greasy kitchen cabinets without damaging the finish. This simple method removes sticky buildup, fingerprints, and cooking residue while protecting painted, wood, and laminate cabinets.
How to Clean Greasy Kitchen Cabinets Without Ruining the Finish
Kitchen cabinets have a frustrating habit of looking clean from across the room while feeling sticky the moment you touch them.
Over time, cooking oils, steam, food splashes, fingerprints, and airborne grease settle onto cabinet doors and handles. A thin layer may not seem like much at first, but repeated cooking can turn it into a stubborn, tacky film.
The natural reaction is to reach for a stronger cleaner and scrub harder.
That’s often where problems begin.
Harsh chemicals, abrasive sponges, excessive water, or aggressive scrubbing can dull the finish, remove paint, damage veneer, or leave permanent marks.
The good news is that you usually don’t need a powerful cleaner to remove everyday kitchen grease. A gentle cleaning solution, a soft cloth, and a little patience can do most of the work.
What You’ll Need
For ordinary greasy buildup, gather:
- Warm water
- A few drops of mild dishwashing liquid
- Two or three microfiber cloths
- A soft sponge, if necessary
- A clean, dry towel
- A small bowl or bucket
That’s it.
You don’t need to soak the cabinets or use a different chemical for every surface.
Step 1: Remove Dust First
Before tackling grease, wipe the cabinet surfaces with a dry microfiber cloth.
Why?
Because dust mixed with moisture and grease can turn into a muddy film that’s harder to remove.
Start at the top of the cabinets and work downward.
Pay particular attention to:
- Cabinet tops
- Door edges
- Around handles
- Areas beside the stove
- Corners
- Lower cabinet doors
Step 2: Make a Gentle Degreasing Solution
Fill a bowl with warm water and add just a few drops of mild dish soap.
The goal isn’t to make an extremely concentrated solution.
Dish soap is designed to help break up grease, making it useful for everyday kitchen residue.
Too much soap, however, can leave a film that requires additional rinsing.
Step 3: Test a Hidden Area First
This is one of the most important steps.
Before cleaning the entire kitchen, test your solution on a small, inconspicuous area.
Different cabinets can have dramatically different finishes.
A solution that’s perfectly fine for one cabinet may not be appropriate for another.
After testing, allow the area to dry and check for:
- Color changes
- Cloudiness
- Streaking
- Swelling
- Softening
- Loss of sheen
If anything looks different, stop and check the cabinet manufacturer’s care instructions.
Step 4: Don’t Soak the Cabinet
This is where many DIY cleaning attempts go wrong.
You want the cloth to be damp—not dripping wet.
Excess water can seep into seams and edges, particularly on wood, MDF, particleboard, and some laminated materials.
Over time, moisture can contribute to swelling, lifting, or damage to the finish.
So wring out your microfiber cloth thoroughly before wiping.
Step 5: Let the Cleaner Do Some of the Work
Instead of scrubbing immediately, gently wipe the greasy area with the damp, soapy cloth.
For stubborn buildup, hold the damp cloth against the area briefly to soften the residue.
Then wipe again.
This is much gentler than attacking the cabinet with a rough scrubber.
Think:
Soften → wipe → repeat.
Not:
Scrub → scrub harder → scrub even harder.
Step 6: Wipe With a Clean Damp Cloth
Once the grease has been removed, use another clean, lightly damp cloth to remove remaining soap.
This step matters because leftover detergent can create a dull or sticky-looking film.
You want the cabinet to be clean—not coated in cleaner.
Step 7: Dry Immediately
Take a clean, dry microfiber cloth and gently dry the surface.
Don’t leave moisture sitting on cabinet doors or around their edges.
Drying also helps prevent streaks and water marks.
What About Painted Cabinets?
Painted cabinets need extra care because the paint and topcoat can vary significantly.
Avoid aggressive scrubbing.
Don’t assume that a stronger degreaser is better.
Start with mild soapy water and a soft cloth.
If the grease doesn’t come off, repeat the process rather than immediately moving to a stronger chemical.
For older or delicate painted cabinets, always follow the manufacturer’s cleaning recommendations when available.
What About Natural Wood Cabinets?
Wood requires particular attention to moisture.
A slightly damp cloth is generally preferable to a soaking-wet one.
Never leave standing water on wooden cabinet surfaces.
Also be careful with homemade acidic cleaners.
Although vinegar is frequently recommended online as an all-purpose cleaner, acidic solutions aren’t appropriate for every wood finish and can affect certain coatings over repeated use.
When in doubt, use a product specifically recommended for your cabinet finish.
What About Laminate Cabinets?
Laminate and other manufactured cabinet surfaces can often tolerate gentle soap-and-water cleaning, but the edges and seams still deserve attention.
Don’t flood the surface.
Don’t allow water to sit around seams.
And avoid abrasive powders and rough scrubbers that can scratch or dull the finish.
The Greasiest Places People Forget
If your cabinets still feel greasy after cleaning, check these areas.
1. Around the handles
Hands transfer oils onto cabinet doors repeatedly.
2. Above the stove
Cooking creates airborne grease that can settle on nearby cabinets.
3. Cabinet edges
Grease often collects along the edges and corners where they’re less visible.
4. Under cabinet doors
The lower edges can accumulate splashes and cooking residue.
5. Cabinet tops
If your cabinets don’t reach the ceiling, the tops can develop an impressive layer of dust and grease.
6. Around hinges
Small amounts of grime can accumulate around hardware.
Cleaning these areas can make the entire kitchen feel noticeably fresher.
What You Should NOT Use on Your Cabinets
When you’re trying to protect a finish, avoiding the wrong products is just as important as choosing the right one.
Be cautious with:
- Steel wool
- Rough scouring pads
- Abrasive powders
- Strong solvents
- Undiluted acids
- Excessive amounts of degreaser
- Bleach unless specifically recommended for the surface
- Furniture polish used where the manufacturer doesn’t recommend it
- Excessive water
And never mix cleaning products.
In particular, never mix bleach with vinegar, ammonia, or other household cleaners.
Some combinations can produce dangerous fumes.
What If the Grease Is Extremely Thick?
If years of grease have accumulated, a gentle soap solution may not remove everything in one pass.
Don’t immediately assume that the cabinet needs a harsh chemical.
Instead:
- Remove surface dust.
- Apply your mild cleaning solution.
- Allow the damp cloth to soften the residue.
- Wipe gently.
- Repeat.
- Rinse with a clean damp cloth.
- Dry immediately.
Several gentle passes are often safer than one aggressive cleaning session.
If the buildup is extremely stubborn, choose a degreaser specifically labeled as safe for your cabinet material and test it first.
A Simple Maintenance Trick That Prevents Heavy Grease
The easiest way to clean greasy cabinets is to stop grease from building up in the first place.
After cooking, quickly wipe areas around the stove and frequently touched cabinet doors.
You don’t need to deep-clean the entire kitchen every day.
A quick wipe can prevent a thin layer of oil from becoming a thick, sticky coating.
Try This Weekly Routine
Daily:
Wipe obvious splashes and fingerprints.
Once a week:
Clean cabinet doors, handles, and the areas closest to the stove.
Every few weeks:
Clean cabinet edges, corners, and tops.
Occasionally:
Inspect hinges, hardware, and areas hidden behind appliances.
This takes much less effort than waiting until the cabinets have years of accumulated grease.
The “Less Is More” Rule
When cleaning kitchen cabinets, more cleaner and more pressure don’t necessarily mean better results.
In fact, the safest approach is often:
Use the mildest cleaner that works.
Start with warm water and a small amount of mild dish soap.
If that works, there’s no reason to escalate.
If it doesn’t, identify the cabinet material and choose a compatible product rather than experimenting with increasingly aggressive homemade mixtures.
The Final Shine
Once the cabinet is clean and completely dry, step back and look at the surface under normal kitchen lighting.
If you still see streaks, use a clean, dry microfiber cloth to gently buff the surface.
Don’t add more cleaning product simply because you see a streak.
Sometimes the problem is simply leftover moisture or detergent residue.
Final Thoughts
Greasy kitchen cabinets don’t require hours of exhausting scrubbing.
The real trick is to remove grease before it becomes a thick, hardened layer—and to clean according to the cabinet’s finish.
Start gently with warm water and a small amount of mild dish soap. Use a soft cloth, avoid excessive moisture, rinse away residue, and dry the surface immediately.
Most importantly, test any new cleaner in an inconspicuous spot first.
Your cabinets don’t need to be attacked to become clean.
Sometimes the safest cleaning method is also the simplest one.