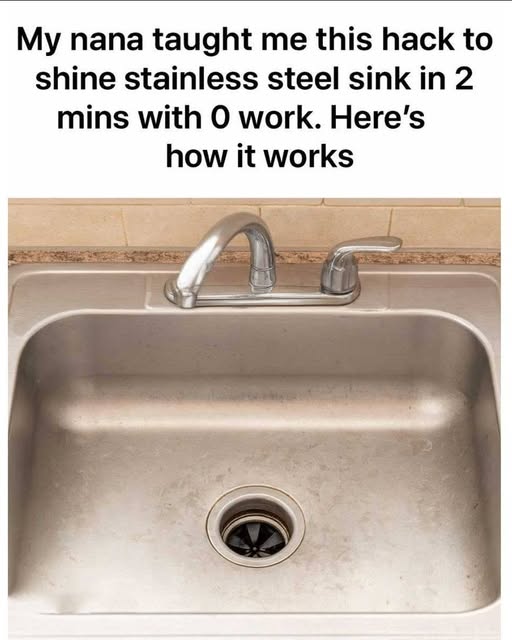
Discover Nana’s simple 2-minute sink-cleaning trick for a sparkling, mirror-like shine without endless scrubbing, plus easy tips to keep your sink clean longer.
Stop Scrubbing Your Life Away: I Tried My Nana’s “Lazy” Sink Hack and I’m Mad I Didn’t Know It Sooner
I used to think getting a truly shiny sink meant standing there with a sponge, scrubbing until my arms were tired.
Then Nana showed me a completely different approach.
Her philosophy was simple:
“Don’t work harder. Let the cleaner do the work.”
Her little sink trick took only a couple of minutes, required almost no scrubbing, and left the surface looking so clean and reflective that I actually stopped to look at it twice.
The secret wasn’t an expensive specialty cleaner.
It was warm water, a little dish soap, and the right finishing technique.
And once I understood why it worked, I realized I had been making sink cleaning much harder than it needed to be.
Nana’s “Lazy” 2-Minute Sink Hack
Here’s the basic routine.
What you need:
- Warm water
- A few drops of ordinary dish soap
- A soft sponge or microfiber cloth
- A clean, dry microfiber cloth
- Optional: a small amount of white vinegar for suitable surfaces
Step 1: Clear the sink
Remove dishes, food scraps, sponges, bottles, and anything else sitting inside the basin.
This takes only a few seconds but makes the rest of the process much easier.
Step 2: Rinse with warm water
Run warm water around the entire sink.
Warm water helps loosen greasy residue, soap film, and food particles that have dried onto the surface.
You don’t need boiling water.
Warm tap water is enough.
Step 3: Add a tiny amount of dish soap
Put a few drops of dishwashing liquid onto a damp sponge or cloth.
You don’t need to create a mountain of foam.
In fact, using too much soap can leave behind its own residue.
Step 4: Wipe instead of aggressively scrubbing
This is the part Nana emphasized.
Rather than attacking every spot with force, gently wipe the entire basin.
Pay special attention to:
- Around the drain
- The faucet base
- Corners
- The edges of the basin
- Areas where water tends to sit
- Around the overflow opening, if your sink has one
If something is stuck, let the warm soapy water sit on it for a minute rather than immediately scrubbing harder.
Step 5: Rinse everything thoroughly
This step is surprisingly important.
Soap residue can make a sink look dull.
Rinse the entire surface until no visible detergent remains.
Step 6: Dry it completely
Here’s the step many people skip.
Take a clean microfiber cloth and wipe the sink completely dry.
This can make a dramatic difference in appearance.
Water droplets contain minerals. When the water evaporates, those minerals can remain behind as spots or deposits.
Drying the sink removes the water before it has a chance to leave those marks.
And that’s where Nana’s “mirror-like shine” really comes from.
Why Drying the Sink Makes Such a Big Difference
Imagine washing a car and then simply letting it air-dry in the sun.
It may be clean, but you can still see water spots.
Your sink can behave the same way.
Even after you’ve cleaned away grease and grime, leftover droplets can dry into visible mineral spots.
That’s why two sinks can receive exactly the same cleaning treatment—but one looks dramatically shinier.
The difference may simply be:
One was dried. The other wasn’t.
The Secret Isn’t More Cleaner—It’s Less Residue
Many people assume that a sparkling sink requires stronger chemicals.
But using too much cleaning product can actually work against you.
Excess cleaner may leave a film on the surface.
That film can attract dirt and make the sink appear cloudy.
Nana’s approach is almost the opposite:
Small amount of cleaner → thorough rinse → complete drying.
Simple.
What If Your Sink Has Hard-Water Spots?
If you regularly see white or chalky marks around your faucet and drain, hard-water minerals may be responsible.
For many stainless-steel or other acid-compatible surfaces, diluted white vinegar can help dissolve mineral deposits.
But don’t automatically use vinegar on every sink.
Acidic cleaners can damage certain materials, finishes, and natural stones.
Never use vinegar on:
- Marble
- Limestone
- Some natural-stone surfaces
- Certain specialty finishes
If you’re unsure what your sink is made from, check the manufacturer’s cleaning instructions first.
And never mix vinegar with bleach or chlorine-based cleaners.
That combination can produce dangerous chlorine gas.
The Stainless-Steel Trick: Follow the Grain
If you have a stainless-steel sink, there’s another small trick that can make cleaning easier.
Look closely at the surface.
You’ll usually notice extremely fine lines running in a particular direction.
That’s the grain.
When wiping stainless steel, following the grain can help minimize the appearance of streaks and scratches.
Instead of making random circular motions, wipe along the direction of the existing finish.
Then finish with a dry microfiber cloth.
What About Baking Soda?
Baking soda is another popular household cleaning ingredient.
A small amount can be useful for certain cleaning tasks because it provides mild abrasion and can help with odors.
But more isn’t better.
If you use it on a delicate or highly polished surface, excessive rubbing can potentially dull the finish.
For everyday sink maintenance, ordinary dish soap and a soft cloth are often enough.
The 30-Second Maintenance Trick
Here’s what Nana’s method taught me:
The easiest sink to clean is the sink you don’t allow to become filthy.
After washing dishes or preparing food, spend about 30 seconds doing this:
- Rinse away food particles.
- Wipe the basin.
- Rinse again.
- Dry the surface.
That’s it.
Doing this regularly prevents layers of grime from building up.
Instead of a major cleaning session later, you’re performing tiny maintenance sessions every day.
Don’t Forget the Faucet
A sparkling basin with a crusty faucet can still make the entire sink look dirty.
Once you’ve cleaned the basin, wipe the faucet with a damp microfiber cloth.
Pay attention to:
- The base
- The handles
- The underside of the spout
- Around the aerator
- Water spots
Then dry it.
If mineral buildup has accumulated around the faucet, use a cleaning method recommended for the faucet’s finish.
Clean the Drain Too
Sometimes the sink itself is spotless but there’s still an unpleasant smell.
The drain may be the culprit.
Food particles, grease, soap residue, and organic debris can accumulate inside the drain.
Regularly flush the drain according to your plumbing system’s recommended maintenance method.
Don’t rely on fragrance to hide a persistent drain odor.
If there’s a recurring foul smell, slow drainage, gurgling, or backing up, the problem may require plumbing attention rather than another cleaning product.
Why Nana’s Method Feels Almost Too Easy
The biggest lesson isn’t really about a particular ingredient.
It’s about contact time and technique.
If grime is stuck to a surface, immediately attacking it with force isn’t always the smartest approach.
Moistening the surface and allowing warm soapy water to loosen residue can reduce the amount of physical effort required.
Then you rinse away the loosened material and dry the surface.
That’s why the process feels “lazy.”
You’re replacing brute force with a little preparation.
A Simple Weekly Deep-Clean Routine
For everyday maintenance, the two-minute routine may be enough.
Once or twice a week, depending on how heavily your sink is used, give it a more thorough cleaning.
Weekly checklist:
1. Empty the sink.
Remove everything.
2. Wash the basin.
Use a suitable cleaner for your sink material.
3. Clean the faucet.
Remove visible residue and water spots.
4. Clean around the drain.
Pay attention to hidden edges where buildup collects.
5. Rinse thoroughly.
Don’t leave cleaning-product residue behind.
6. Dry everything.
Use a fresh microfiber cloth.
7. Wash or replace your cleaning cloth.
A dirty cloth can simply redistribute grime.
One Important Warning About “Natural Cleaning Hacks”
Social media is full of recipes promising that one household ingredient can clean everything.
Be careful with those claims.
Not every natural ingredient is safe for every surface.
Before using vinegar, lemon juice, baking soda, salt, essential oils, or other homemade mixtures, consider the material you’re cleaning.
And never combine cleaning chemicals unless the product manufacturer specifically says the combination is safe.
In particular, don’t mix bleach with:
- Vinegar
- Ammonia
- Acidic toilet cleaners
- Other unknown cleaning products
The Real Secret to a Shiny Sink
After trying Nana’s method, I realized the “secret” wasn’t some magical ingredient.
It was a simple sequence:
Loosen → wipe → rinse → dry.
And perhaps the most useful part is the last one.
A sink that is properly rinsed and dried can look noticeably cleaner without requiring aggressive scrubbing or a cabinet full of specialty products.
So the next time your sink looks dull, don’t immediately reach for the strongest cleaner you own.
Grab a soft cloth, warm water, a little dish soap, and two minutes.
You might discover that Nana wasn’t being lazy at all.
She had simply figured out how to make cleaning do more of the work for her.