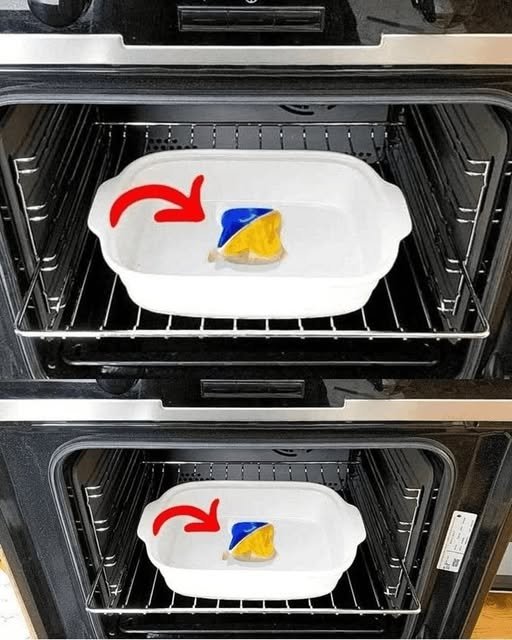
The trick to cleaning your oven effortlessly can help loosen burnt-on grease, baked-on food, and stubborn stains. Try this simple cleaning method for a fresher, cleaner oven with less scrubbing.
The Trick to Cleaning the Oven “Effortlessly” — Even Burnt-On Grease and Stubborn Stains
Cleaning the oven is one of those household chores that many people put off for as long as possible. Grease splatters, food spills, and baked-on residue can quickly turn into hard, dark stains that seem almost impossible to remove. The good news is that you don’t always need expensive oven cleaners or hours of aggressive scrubbing.
With a simple combination of warmth, water, dish soap, and baking soda, you can soften stubborn buildup and make the cleaning process considerably easier.
Why Oven Grease Becomes So Difficult to Remove
Fresh spills are usually relatively easy to wipe away. The problem begins when grease and food residue are exposed to high temperatures repeatedly.
Every time the oven is used, leftover grease can become more firmly baked onto the surface. Eventually, you may notice:
- Brown or black patches
- Sticky grease around the oven door
- Burnt food along the bottom
- Greasy oven racks
- Cloudy or dirty glass
- Crusty residue around the edges
Trying to remove these deposits while they are completely dry can require a lot of effort. The key is to soften the buildup first.
The Simple Steam Trick
One of the easiest approaches is to use steam to loosen grime before wiping.
What You’ll Need
- An oven-safe baking dish
- 2–3 cups of hot water
- A few tablespoons of dishwashing liquid
- Baking soda
- White vinegar
- A microfiber cloth or sponge
- A non-scratch scrubber
- Rubber gloves
Step 1: Remove Everything From the Oven
Before cleaning, take out the oven racks, trays, thermometer, pizza stone, or any other removable items.
Brush away loose crumbs and burnt pieces. You don’t need to scrub anything yet.
This first step prevents loose debris from getting in your way during the deeper cleaning.
Step 2: Use Steam to Soften the Grease
Preheat the oven to a low temperature, around 200°F (95°C), for a few minutes and then turn it off.
Place an oven-safe dish containing hot water inside the warm oven. Close the door and leave it for approximately 20–30 minutes.
The warm moisture helps loosen dried grease and food residue.
Never leave the oven unattended while heating, and always follow your oven manufacturer’s instructions.
Step 3: Make a Gentle Cleaning Paste
For stubborn areas, make a paste using:
- ½ cup baking soda
- A few tablespoons of water
- A small amount of dish soap
Mix until you have a thick, spreadable paste.
Apply it to areas with stubborn grease and burnt-on residue. Avoid coating heating elements, vents, electrical components, or areas specifically identified by your oven’s manufacturer as unsuitable for cleaning products.
Leave the paste for several hours or overnight if the buildup is particularly stubborn.
Step 4: Wipe Away the Loosened Grime
Use a damp microfiber cloth or non-scratch sponge to remove the paste and softened grease.
Instead of scrubbing aggressively, work in small sections. For particularly stubborn spots, apply another layer of paste and allow it more time to soften the residue.
This is where the method saves effort: letting the cleaning solution do more of the work reduces the amount of scrubbing required.
Step 5: Clean the Oven Door
The glass door can collect a surprising amount of grease.
Apply a thin layer of the baking-soda paste to the glass, avoiding seals and areas where the manufacturer advises against using abrasive products.
Let it sit for a while, then gently wipe it away with a damp cloth.
For the final pass, use clean water to remove any remaining residue and dry the glass with a microfiber towel.
Step 6: Don’t Forget the Oven Racks
Remove the racks and place them in a bathtub, large basin, or other suitable container.
Cover them with hot water and add some dishwashing liquid. Allow them to soak for several hours.
Once the residue has softened, gently scrub the racks with a non-scratch sponge or suitable brush. Rinse thoroughly and dry them before putting them back.
If your oven manufacturer recommends a specific method for cleaning the racks, follow those instructions instead.
What About Extremely Burnt Areas?
Some old, carbonized deposits may not disappear after one cleaning session.
For these areas, patience is usually better than excessive force.
Apply the cleaning paste again, allow additional soaking time, and gently work on the residue in stages.
A plastic scraper designed for the surface can sometimes help with softened buildup, but avoid metal tools that could scratch enamel or glass.
A Quick Maintenance Trick
The easiest oven to clean is one that doesn’t have months of accumulated grease.
After cooking, allow the oven to cool completely and wipe away fresh splashes as soon as it is safe to do so.
You can also place a baking tray beneath foods that are likely to bubble or spill. This can prevent large amounts of grease from reaching the oven floor.
Important Oven-Cleaning Mistakes to Avoid
Don’t Mix Cleaning Chemicals
Never mix different household cleaning products unless the product labels specifically say they are compatible. In particular, never mix bleach with ammonia or acidic cleaners, because dangerous fumes can result.
Don’t Pour Water Into a Hot Oven
A sudden temperature change can damage glass or other components. Use controlled amounts of water and follow your appliance manufacturer’s instructions.
Don’t Scrub Heating Elements
Heating elements can be damaged by aggressive cleaning. Clean around them carefully and consult the manufacturer’s instructions.
Don’t Use Abrasive Tools on Glass
Steel wool, sharp blades, or harsh abrasive pads can scratch oven glass or enamel surfaces.
Don’t Ignore the Manufacturer’s Instructions
Different ovens have different finishes, heating systems, self-cleaning features, and cleaning requirements. The owner’s manual should always take priority over general cleaning advice.
How Often Should You Clean Your Oven?
There isn’t one perfect schedule for every household, but a useful approach is:
- Quick wipe: After noticeable spills
- Light cleaning: Every few weeks if you cook frequently
- Deep cleaning: Every few months or whenever significant buildup appears
If you regularly cook foods that splatter or bubble over, you may need to clean the oven more frequently.
The Bottom Line
You don’t necessarily need hours of hard scrubbing to deal with a dirty oven. Softening the buildup first is the real trick.
Steam can loosen grease, while a baking-soda-based paste can help lift stubborn residue. Give the cleaning products time to work, use gentle tools, and clean the oven regularly to prevent heavy buildup from returning.
With a little preparation and patience, even an oven covered in old grease and burnt-on food can become much easier to clean.